
- 作者:老汪软件技巧
- 发表时间:2024-12-06 07:02
- 浏览量:
作为前端开发,我们每天都要和vscode打交道,并且安装了很多好用的插件,帮助我们快速开发,下面我们来看看如何开发一个vscode插件。
启动
第一步就是安装开发插件需要的库:Yeoman(脚手架工具)和vscode扩展生成器。可以直接使用以下命令:
npm install -g yo generator-code
然后使用yo命令搭建项目,并选择配置信息的字段:
yo code
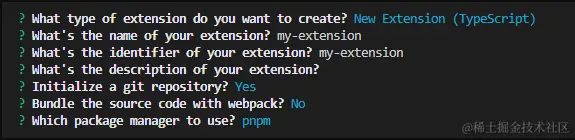
最后生成的项目结构:
|-- my-extension
    |-- .vscode
    |-- node_modules
    |-- src
            |-- test
                    |-- suite
                    |-- runTest.ts
            |-- extension.ts
    |-- .eslintrc.json
    |-- .gitignore
    |-- .npmrc
    |-- .vscodeignore
    |-- CHANGELOG.md
    |-- package.json
    |-- pnpm-lock.yaml
    |-- README.md
    |-- tsconfig.json
    |-- vsc-extension-quickstart.md
其中src目录下的extension.ts文件就是开发的入口文件。如下:
import * as vscode from 'vscode';
// 插件激活时执行activate函数
export function activate(context: vscode.ExtensionContext) {
    // 注册一个命令: test.helloWorld,每次执行该命令时会弹出一个info消息框
    let disposable = vscode.commands.registerCommand('test.helloWorld', () => {
            vscode.window.showInformationMessage('Hello World from test!');
    });
    // 插件停用时删除该命令
    context.subscriptions.push(disposable);
}
// 插件停用时执行的函数
export function deactivate() {}
项目的package.json文件如下:
{
  ...
  "activationEvents": [],
  "main": "./out/extension.js",
  "contributes": {
    "commands": [
      {
         // 注册的命令
        "command": "my-extension.helloWorld",
         // 外部输入的命令名称
        "title": "Hello World"
      }
    ]
  },
  "scripts": {
    "vscode:prepublish": "pnpm run compile",
    "compile": "tsc -p ./",
    "watch": "tsc -watch -p ./",
    "pretest": "pnpm run compile && pnpm run lint",
    "lint": "eslint src --ext ts",
    "test": "node ./out/test/runTest.js"
  },
  "devDependencies": {
    ...
  }
}
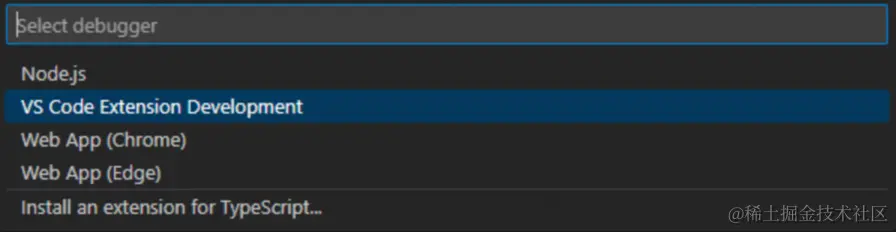
可以打开一个新的终端cd到test项目根目录下,先使用pnpm compile命令编译并在src目录下生成out目录, 然后按F5(选择VS Code Extension Development),vscode会打开的一个新的窗口编译、运行插件。
此时在新窗口使用快捷键Ctrl+Shift+P打开命令面板,然后输入默认注册的"Hello World"命令。效果如下:

开发
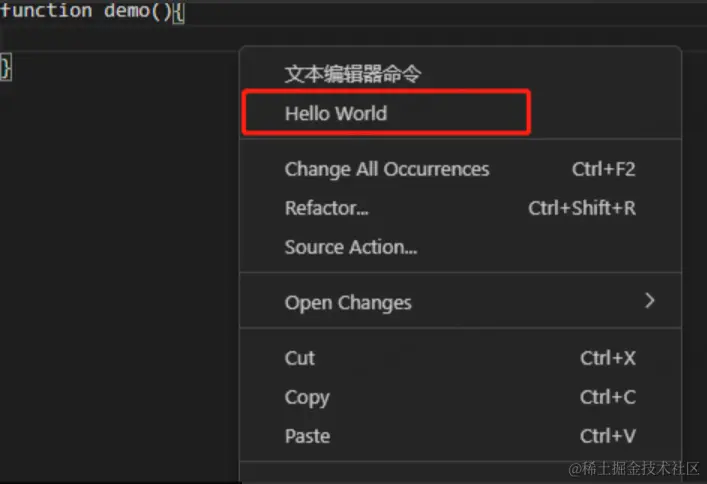
除了在命令面板输入命令之外,还可以使用其他方式执行命令。例如,把命令添加到右键菜单中。package.json的配置如下:
 "contributes": {
    "commands": [
      {
        "command": "my-extension.helloWorld",
        "title": "Hello World"
      }
    ],
     // 将命令添加到右键上下文菜单中
    "menus": {
      "editor/context": [
        {
          "command": "my-extension.helloWorld",
          "group": "navigation"
        }
      ]
    }
  }
此时鼠标右键显示菜单项时就可以看到Hello World命令了,点击执行的效果与命令面板执行的效果一致:
可以添加一些限制,在条件符合的情况下右键才显示命令,如下:
"menus": {
      "editor/context": [
        {
          "command": "mock-data",
          "group": "navigation",
            // 只有当在ts文件中,且选中了内容之后才显示命令
          "when": "editorHasSelection && editorTextFocus && editorLangId == 'typescript' && editorHasMultipleSelections == false"
        }
      ]
}
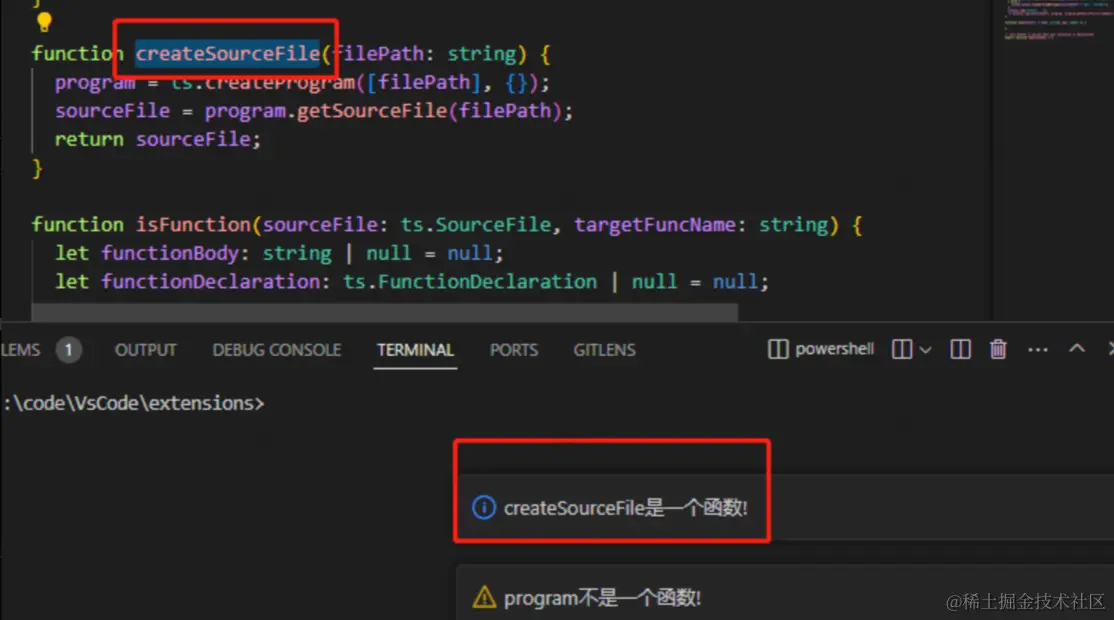
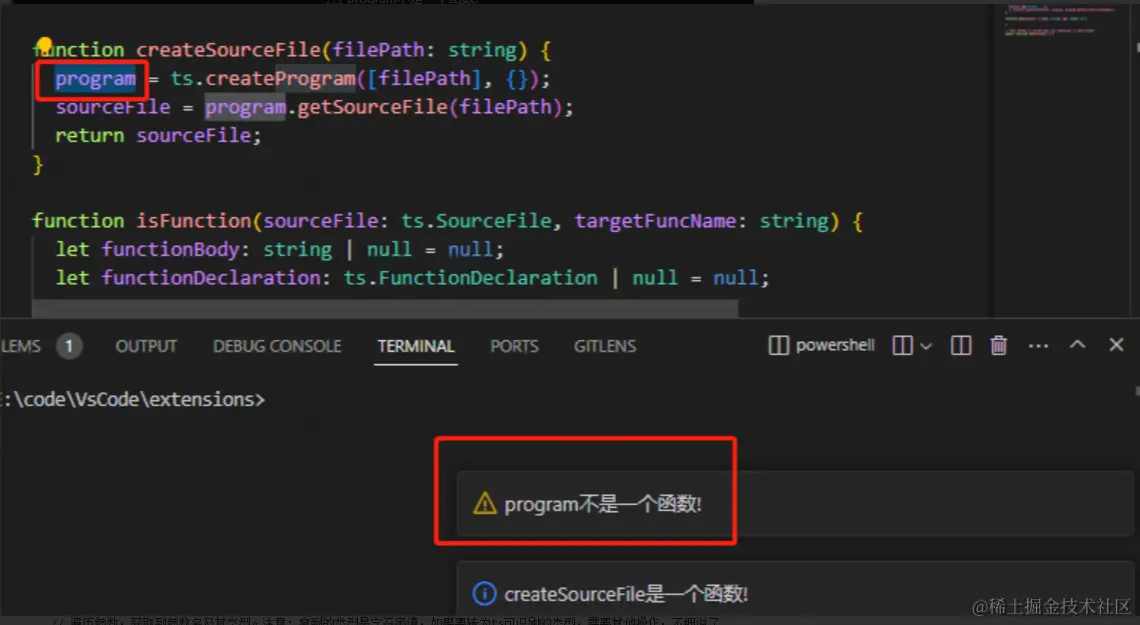
我们希望能够识别到当前选中的内容是否是一个函数,此时就可以extension.ts文件中写入主体逻辑:
export function activate(context: vscode.ExtensionContext) {
        // 注册该事件
        const textEditorSelectionDisposable = vscode.window.onDidChangeTextEditorSelection(handleSelectionChange);
        const commandDisposable = vscode.commands.registerCommand("my-extension.helloWorld", (uri) => {
                vscode.window.showInformationMessage(uri);
        });
        // 插件停用时移除事件监听
        context.subscriptions.push(textEditorSelectionDisposable, commandDisposable);
}
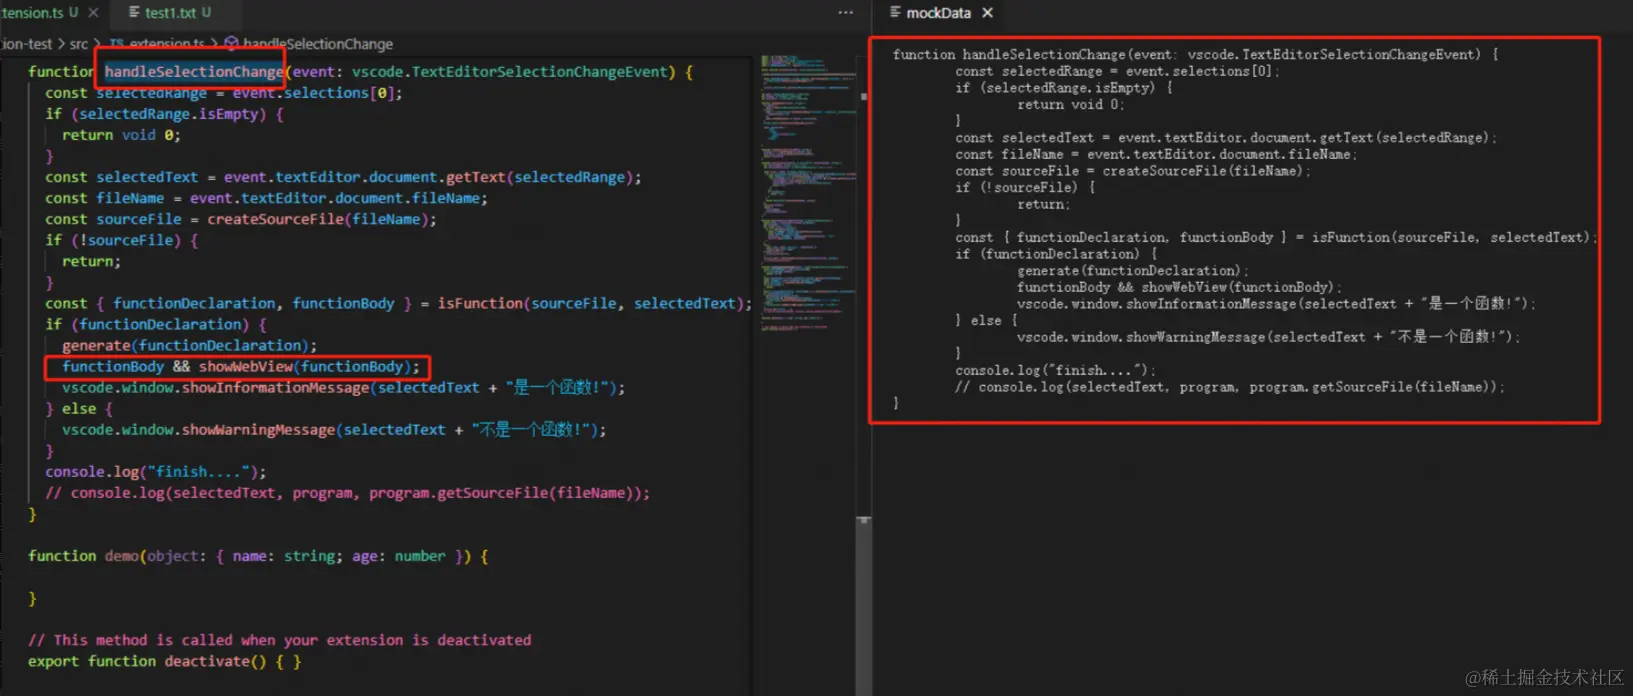
function handleSelectionChange(event: vscode.TextEditorSelectionChangeEvent) {
        // 获取选中的文本对象
        const selectedRange = event.selections[0];
    // 如果没有内容被选中,那就直接返回
        if (selectedRange.isEmpty) {
                return void 0;
        }
    // 获取选中的文本字符串

        const selectedText = event.textEditor.document.getText(selectedRange);
        // 获取当前文本编译器节点的路径
        const fileName = event.textEditor.document.fileName;
}
import * as ts from 'typescript';
let program: ts.Program | undefined;
let sourceFile: ts.SourceFile | undefined;
// 传入选中内容所在的文件路径
function createSourceFile(filePath: string) {
    // 获取文件的编译结果
        program = ts.createProgram([filePath], {});
    // 获取AST
        sourceFile = program.getSourceFile(filePath);
        return sourceFile;
}
function isFunction(sourceFile: ts.SourceFile, targetFuncName: string) {
        let functionBody: string | null = null;
        let functionDeclaration: ts.FunctionDeclaration | null = null;
        // 递归子节点
        const visit = (node: ts.Node): boolean => {
        // 判断当前节点是否是typescript类型定义的函数声明类型
                if ([ts.SyntaxKind.FunctionDeclaration].includes(node.kind)) {
            // 遍历子节点
                        const hasResult = ts.forEachChild(node, (childNode) => {
                 // 判断当前子节点是否是一个标识符,且子节点的文本是否===选中的文本
                                if (childNode.kind === ts.SyntaxKind.Identifier && childNode.getText(sourceFile) === targetFuncName) {
                     // 获取到函数体
                                        functionBody = node.getText(sourceFile);
                      // 获取到函数声明
                                        functionDeclaration = node as ts.FunctionDeclaration;
                     // 此处返回true,forEachChild会停止遍历并返回
                                        return true;
                                }
                        });
                        if (hasResult) {
                                return true;
                        }
                }
                return Boolean(ts.forEachChild(node, visit));
        };
        visit(sourceFile);
        return {
                functionBody,
                functionDeclaration
        };
}
function handleSelectionChange(event: vscode.TextEditorSelectionChangeEvent) {
        const selectedRange = event.selections[0];
        if (selectedRange.isEmpty) {
                return void 0;
        }
        const selectedText = event.textEditor.document.getText(selectedRange);
        const fileName = event.textEditor.document.fileName;
        const sourceFile = createSourceFile(fileName);
        if (!sourceFile) {
                return;
        }
        const { functionDeclaration } = isFunction(sourceFile, selectedText);
        if (functionDeclaration) {
                vscode.window.showInformationMessage("是一个函数!");
        } else {
                vscode.window.showInformationMessage("不是一个函数!");
        }
}
/**
 推荐的库:ts-auto-mock: https://typescript-tdd.github.io/ts-auto-mock
*/
function generate(functionDeclaration: ts.FunctionDeclaration) {
    // 获取到函数的入参数组
        const params = functionDeclaration.parameters;
    // 遍历参数,获取到参数名及其类型。注意:拿到的类型是字符串值,如果要转为ts可识别的类型,需要其他操作,不细说了
        for (const param of params) {
                if (ts.isParameter(param)) {
                        const paramName = param.name.getText(sourceFile);
                        const typeNode = param.type;
                        paramType = typeNode ? typeNode.getText(sourceFile) : "any";
                        console.log(paramName, paramType);
                }
        }
        // ... 关于生成mock数据的具体操作,不细说了
}
可以在窗口右侧打开一个网页,显示我们想要输出的内容,如下:
// 这里窗口对象保存到全局变量中,防止重复创建
let panel: vscode.WebviewPanel | undefined;
function showWebView(content: string) {
if (panel) {
// 如果已有窗口,则显示
panel.reveal(vscode.ViewColumn.Two);
} else {
// 创建网页窗口
panel = vscode.window.createWebviewPanel("mockData", "mockData", vscode.ViewColumn.Two, {
enableScripts: true
});
panel.onDidDispose(() => (panel = undefined));
}
// 将内容填入html模板
panel.webview.html = `
${content}
`;}
除了命令面板、右侧菜单、鼠标右键菜单命令、消息提示框之外,vscode插件还支持主题颜色、树视图、键绑定等等其他功能。具体可参照:Extension Guides | Visual Studio Code Extension API
发布
要将插件打包发布,可以使用vsce用于打包、发布和管理 VS Code 扩展的命令行工具。
npm install -g @vscode/vsce
打包:
vsce package
发布:
vsce publish
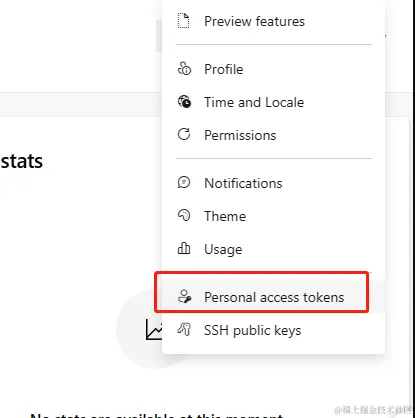
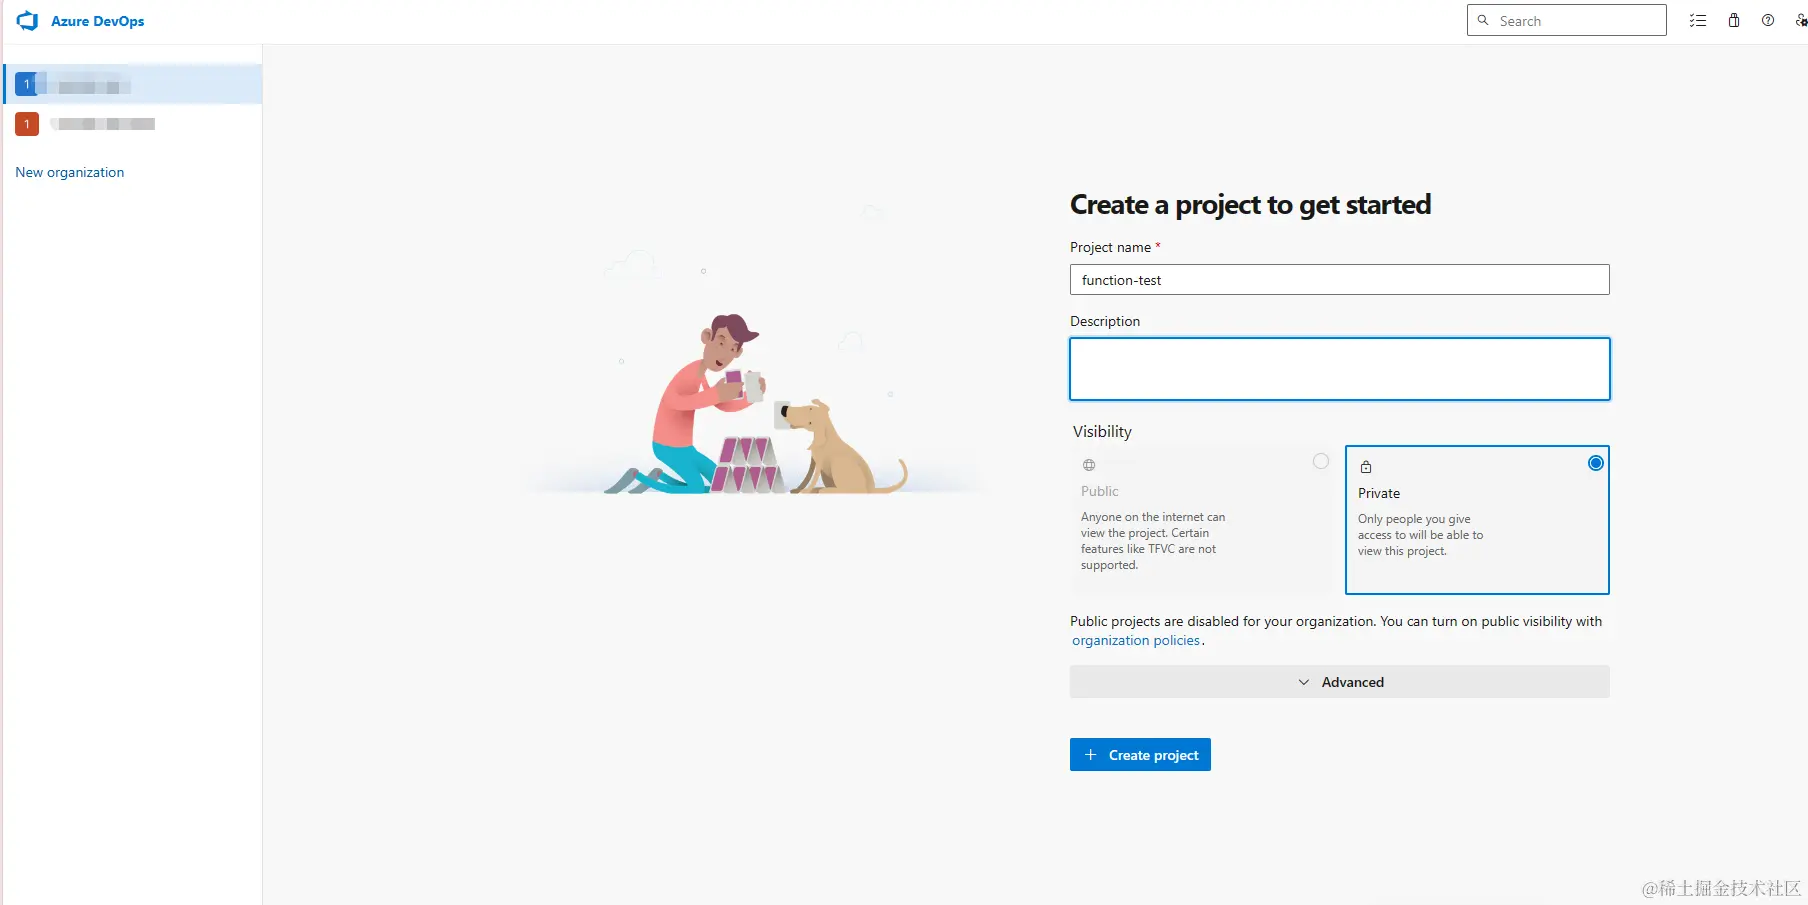
需要注意的是,vsce只能使用个人访问token来发布扩展。所以需要先在Azure DevOps创建账号,然后再设置中获取到token:
然后在发布者管理页创建发布者并填写表单。然后使用已生成的个人访问token验证,通过后就可以发布插件了。
总结
可以通过新建vscode插件实现一些特殊的功能,帮助自己完成一些任务,同时能够让自己的vscode功能更加强大。
往期年度总结往期文章专栏文章


