
- 作者:老汪软件技巧
- 发表时间:2024-10-16 15:02
- 浏览量:
沉浸式状态栏导航一、概念
沉浸式状态栏是一种让应用与系统UI融合的设计手法,通常指状态栏透明或与应用背景色一致,使得应用界面看起来更加统一和流畅
开发应用沉浸式效果 官方文档
二、实现沉浸式状态栏的原因提升视觉体验:减少视觉割裂感,增强沉浸感。优化界面空间:隐藏状态栏或透明化状态栏,扩大应用内容区域。减少用户干扰:让用户更专注于应用内容,避免状态栏信息的分散注意力。符合设计趋势:提升应用的现代感与专业性。三、实现方式HarmonyOS (ArkTS)
第一步直接在 入口函数的EntryAbility里面进行配置,开启全屏显示
// 开启全屏沉浸式导航模式
const win = windowStage.getMainWindowSync()
win.setWindowLayoutFullScreen(true)
// 获取顶部规避区域,并记录到 AppStorage 中
const top = win.getWindowAvoidArea(window.AvoidAreaType.TYPE_SYSTEM)
  .topRect
AppStorage.setOrCreate('safeTop', px2vp(top.height))
// 获取底部规避区域,并记录到 AppStorage 中
const bottom = win.getWindowAvoidArea(window.AvoidAreaType.TYPE_NAVIGATION_INDICATOR)
  .bottomRect
AppStorage.setOrCreate('safeBottom', px2vp(bottom.height))
放的位置:onWindowStageCreate
看一下前后效果
开启后发现 组件占位被状态栏遮盖,以及下面的导航条,此时接着下一步
第二步
第一步我们不仅开启了全屏显示,其实还做了一件事就是我们获取并储存了顶部和底部的安全距离,接下来就是在组件里用起来就了
@Entry
@Component
struct Index {
  //底部安全距离
  @StorageProp('safeBottom') safeBottom: number = 0
  //顶部导航栏高度
  @StorageProp('safeTop') safeTop: number = 0
  tabs: string[] = ['首页', '消息', '我的'];
  build() {
    Navigation() {
      Tabs({ barPosition: BarPosition.End }) {
        ForEach(this.tabs, (item: string, index) => {
          TabContent() {
            if (index === 0) {
              Text('首页')
            } else if (index === 1) {
              Text('消息')
            } else {
              Column() {
                Text('我的导航栏')
                  .width('100%')
                  .height(60)
                  .textAlign(TextAlign.Center)
                  .backgroundColor('rgba(214, 108, 108, 1.00)')
                .padding({ top: this.safeTop })
              }
              .width('100%')
              .height('100%')
              .backgroundColor(Color.Orange)
            }
          }.tabBar(item)
        })
      }
    }.hideTitleBar(true)
    .padding({ bottom: this.safeBottom })
  }
}
效果展示:
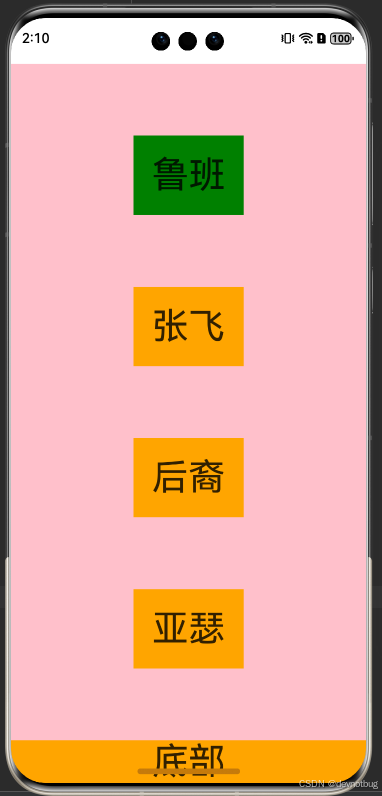
两个步骤就完成了,如果说其他组件需要规避导航区域就直接使用AppStorage去拿到安全距离设一下padding就完事了
最后补充其实也发现一些不足,很多时候我们这个状态栏是黑色不美观,我们还需要改一下这个状态栏的颜色完成案例效果:
也是蛮常用的,具体实现呢也非常简单方法呢也不止一种,首先是我这个案例由于我用的是一个页面,组件也没抽出去,所以组件页面没没办法用组件或者页面的生命周期函数,所以我用到的是监听组件或页面的可见区域变化,并根据当前的可见性和可见区域的比例,动态调整状态栏内容的颜色。具体来说:
onVisibleAreaChange:这个方法监听页面或组件的可见区域的变化,并传入两个参数:
状态栏颜色设置:
.onVisibleAreaChange([0.0, 1.0], (isVisible: boolean, currentRatio: number) => {
  if (isVisible && currentRatio >= 1.0) {
    window.getLastWindow(getContext())
      .then((win) => {
        win.setWindowSystemBarProperties({ statusBarContentColor: '#FFFFFF' })
      })
  }
  if (!isVisible && currentRatio <= 0.0) {
    window.getLastWindow(getContext())
      .then((win) => {
        win.setWindowSystemBarProperties({ statusBarContentColor: '#000000' })
      })
  }
})
完整示例代码:
import { window } from '@kit.ArkUI';
@Entry
@Component
struct Index {
  //底部安全距离
  @StorageProp('safeBottom') safeBottom: number = 0
  //顶部导航栏高度
  @StorageProp('safeTop') safeTop: number = 0
  tabs: string[] = ['首页', '消息', '我的'];
  build() {
    Navigation() {
      Tabs({ barPosition: BarPosition.End }) {
        ForEach(this.tabs, (item: string, index) => {
          TabContent() {
            if (index === 0) {
              Text('首页')
            } else if (index === 1) {
              Text('消息')
            } else {
              Column() {
                Text('我的导航栏')
                  .width('100%')
                  .height(60)
                  .textAlign(TextAlign.Center)
                  .backgroundColor('rgba(214, 108, 108, 1.00)')
                .padding({ top: this.safeTop })
              }
              .width('100%')
              .height('100%')
              .backgroundColor(Color.Orange)
              .onVisibleAreaChange([0.0, 1.0], (isVisible: boolean, currentRatio: number) => {
                if (isVisible && currentRatio >= 1.0) {
                  window.getLastWindow(getContext())
                    .then((win) => {
                      win.setWindowSystemBarProperties({ statusBarContentColor: '#FFFFFF' })
                    })
                }
                if (!isVisible && currentRatio <= 0.0) {
                  window.getLastWindow(getContext())
                    .then((win) => {
                      win.setWindowSystemBarProperties({ statusBarContentColor: '#000000' })
                    })
                }
              })
            }
          }.tabBar(item)
        })
      }
    }.hideTitleBar(true)
    .padding({ bottom: this.safeBottom })
  }
}
效果展示:
还有一种呢就是非常常用在组件或者页面的生命周期钩子上:
aboutToAppear(): void {
  window.getLastWindow(getContext())
    .then((win) => {
      win.setWindowSystemBarProperties({ statusBarContentColor: '#FFFFFF' })
    })
}
aboutToDisappear(): void {
  window.getLastWindow(getContext())
    .then((win) => {
      win.setWindowSystemBarProperties({ statusBarContentColor: '#000000' })
    })
}
onPageShow
(): void {
  window.getLastWindow(getContext())
    .then((win) => {
      win.setWindowSystemBarProperties({ statusBarContentColor: '#FFFFFF' })
    })
}
onPageHide
(): void {
  window.getLastWindow(getContext())
    .then((win) => {
      win.setWindowSystemBarProperties({ statusBarContentColor: '#000000' })
    })
}
实现的效果都是一样的,最后提醒一下,这个颜色必须写成'#FFFFFF''#000000'否则也会导致颜色没有变化,注意一下就好了反正我当时找半天找不出来哪的问题,还必须是6位写全
四、结语
沉浸式状态栏设计在现代应用中已经越来越普遍,尤其是全屏体验需求强烈的场景下,如媒体播放、游戏和浏览器。通过本文的实现步骤,我们可以看到,HarmonyOS 中提供的窗口管理接口十分灵活,能够轻松实现沉浸式状态栏导航效果,且具备极好的拓展性。开发者可以根据实际需求,对状态栏颜色、系统按钮显示进行进一步优化,为用户提供更统一、流畅的视觉体验。


